iOS UIAppearance 探秘
探究 UIAppearance 的原理,活学活用 UIAppearance。
# 前言
在 iOS 开发中经常会用到诸如
[UINavigationBar appearance].barTintColor = xxx;
这种用来全局设置某个控件的属性的代码。表面上看,appearance 的作用就是统一外观设置,那么它的原理究竟是什么呢?它里面究竟干了些什么事?怎么用才是比较正确的用法呢?
# 概念
UIApearance 实际上是一个协议(Protocol),我们可以用它来获取一个类的外观代理(Appearance Proxy)。该协议需实现这几个方法:
+ (instancetype)appearance;
+ (instancetype)appearanceWhenContainedInInstancesOfClasses:(NSArray<Class <UIAppearanceContainer>> *)containerTypes NS_AVAILABLE_IOS(9_0);
// 详细方法见 UIKit/UIAppearance.h
另外一个与之对应的协议是 UIAppearanceContainer,该协议并没有任何约定方法。因为它只是作为一个容器。
常见的,如 UIView 实现了 UIAppearance 这两种协议,既可以获取外观代理,也可以作为外观容器。
而 UIViewController 则是仅实现了 UIAppearanceContainer 协议,很简单,它本身是控制器而不是 view,作为容器,为 UIView 等服务。
事实上,在使用中,我们所有的视图类都继承自 UIView,UIView 的容器也基本上是 UIView 或 UIController,基本不需要自己去实现这两个协议。对于需要支持使用 appearance 来设置的属性,在属性后增加 UI_APPEARANCE_SELECTOR 宏声明即可。
文档中也有解释 UI_APPEARANCE_SELECTOR 用来标记属性用于外观代理,支持哪些类型等等。
 To participate in the appearance proxy API, tag your appearance property selectors in your header with UI_APPEARANCE_SELECTOR.

 Appearance property selectors must be of the form:
 - (void)setProperty:(PropertyType)property forAxis1:(IntegerType)axis1 axis2:(IntegerType)axis2 axisN:(IntegerType)axisN;
 - (PropertyType)propertyForAxis1:(IntegerType)axis1 axis2:(IntegerType)axis2 axisN:(IntegerType)axisN;
 You may have no axes or as many as you like for any property. PropertyType may be any standard iOS type: id, NSInteger, NSUInteger, CGFloat, CGPoint, CGSize, CGRect, UIEdgeInsets or UIOffset. IntegerType must be either NSInteger or NSUInteger; we will throw an exception if other types are used in the axes.
# 原理
写一个简单的小 Demo,自定义 CardView,有两个 subview: headerView 和 footerView,声明 2 个属性:
@property (nonatomic, strong) UIColor *headerColor UI_APPEARANCE_SELECTOR;
@property (nonatomic, strong) UIColor *bodyColor UI_APPEARANCE_SELECTOR;
Setter 方法都加断点调试:
- (void)setHeaderColor:(UIColor *)headerColor
{
    _headerColor = headerColor;
    self.headerView.backgroundColor = _headerColor;
}

- (void)setBodyColor:(UIColor *)bodyColor
{
    _bodyColor = bodyColor;
    self.bodyView.backgroundColor = _bodyColor;
}
在 ViewController 的 view 中加一个按钮,点击则创建并添加 CardView,每行代码均加断点:
- (IBAction)createButtonTouched:(id)sender
	CardView *cardView = [[CardView alloc] initWithFrame:CGRectMake(20, 100, 80, 120)];
	[self.view addSubview:cardView];
	cardView.headerColor = [UIColor greenColor];
}
另外,在较早的时候,添加 appearance 设置:
[CardView appearance].headerColor = [UIColor redColor];
[CardView appearance].bodyColor = [UIColor orangeColor];
运行发现,在通过 appearance 设置属性的时候,并没有调用 setter 方法,由此可知 appearance 并不会生成实例,立即赋值。当 cardView 被添加到主视图(即视图树)中去的时候,才依次调用两个 setter 方法,调用栈如下
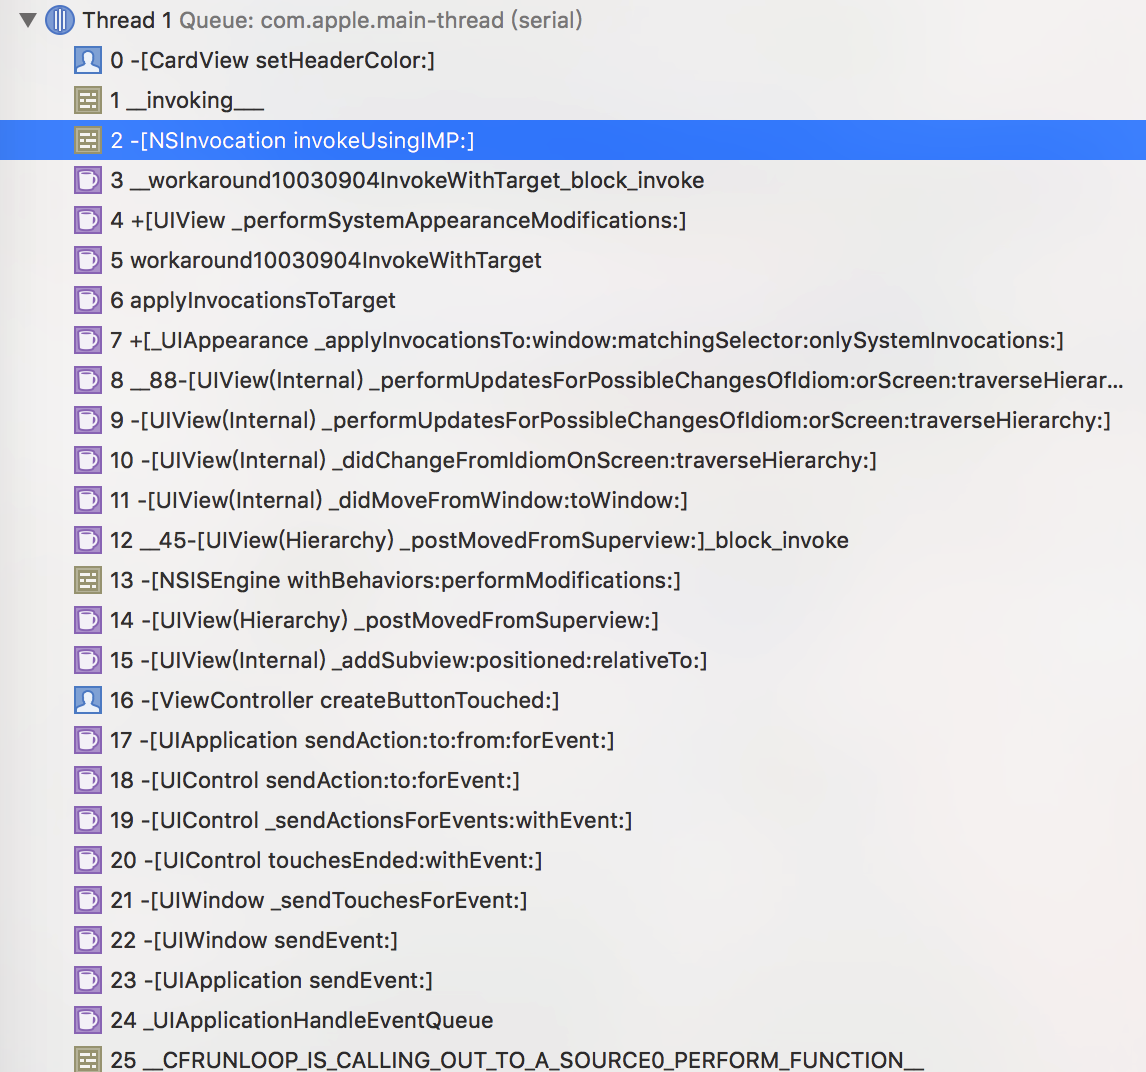
从 15 至 11 可以看出确实是加入到视图树中才触发的,从 7 至 2 可以基本猜测出,appearance 设置的属性,都以 Invocation 的形式存储到 _UIApperance 类中(事实上 _UIApperance 类中就有一个 _appearanceInvocations 数组),等到视图树 performUpdates 的时候,会去检查有没有相关的属性设置,有则 invoke。(这里可以看看 NSInvocation)
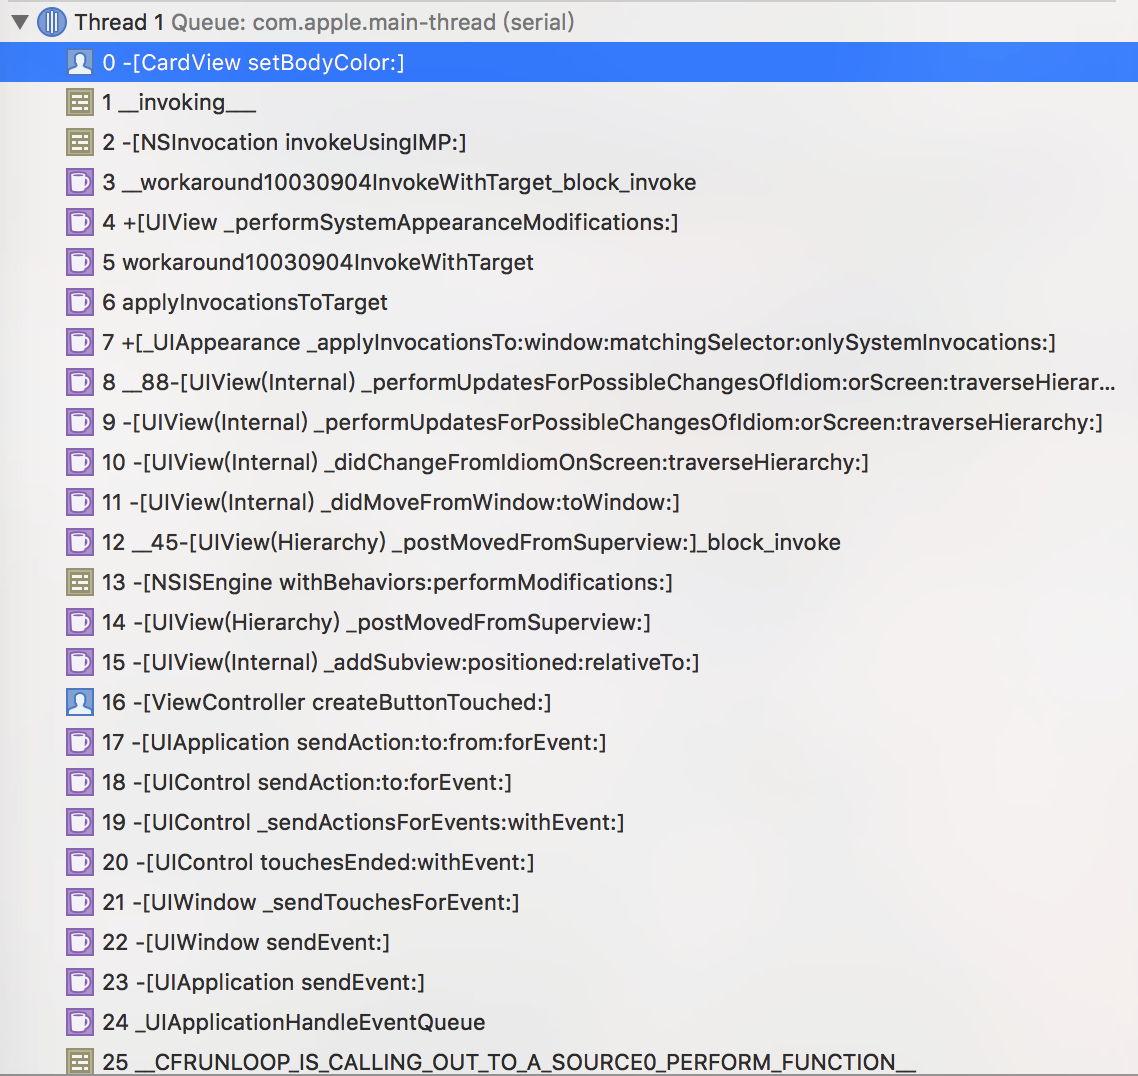
紧接着,它进入了 bodyColor 的 setter
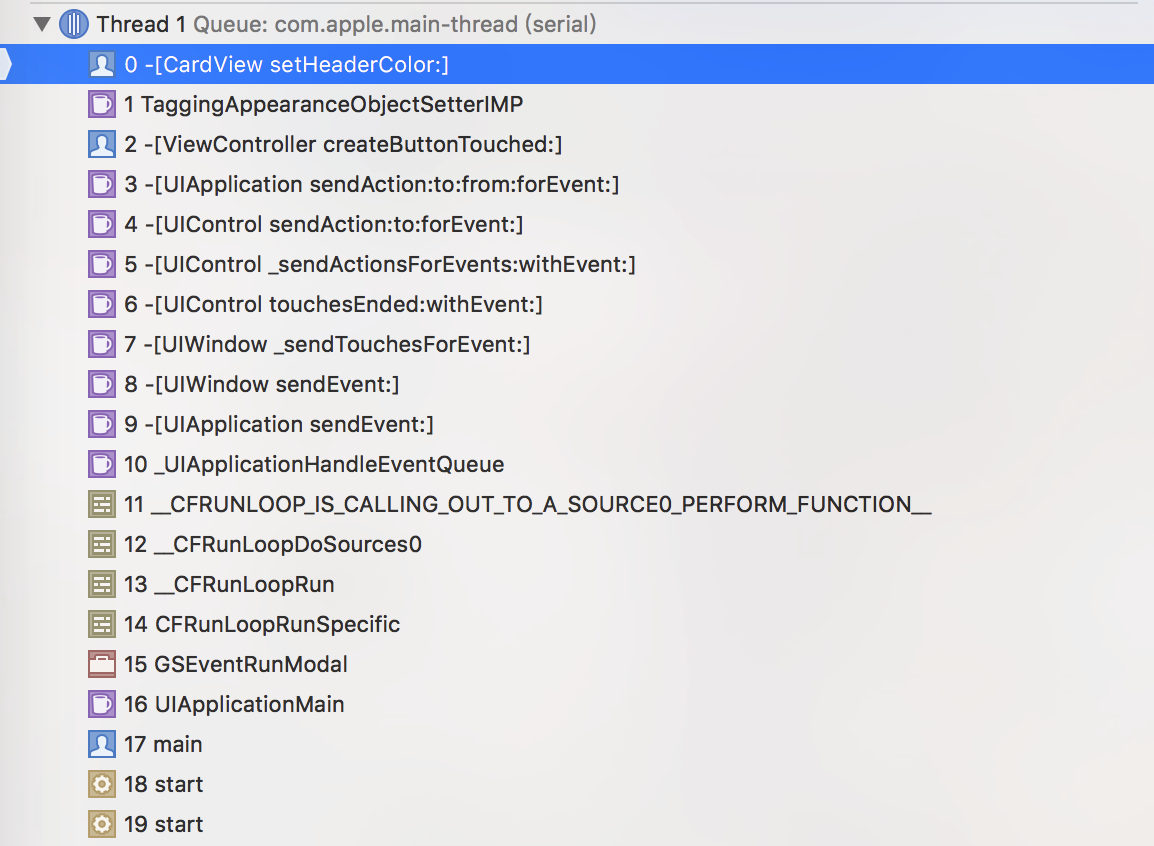
然后,当手动设置属性的时候,它是直接进入 setter 的。
到这里,基本清晰了。
每一个实现 UIAppearance 协议的类,都会有一个 _UIApperance 实例,保存着这个类通过 appearance 设置属性的 invocations,在该类被添加或应用到视图树上的时候,它会检查并调用这些属性设置。这样就实现了让所有该类的实例都自动统一属性。
当然,如果后面又手动设置了属性,肯定会覆盖了。从上面可以知道,appearance 生效是在被添加到视图树时,所以,在此之后设置 appearance,则不会起作用,而在手动设置属性之后被添加到视图树上,手动设置的会被覆盖。appearance 只是起到一个代理作用,在特定的时机,让代理替所有实例做同样的事。
尝试一下,去掉 UI_APPEARANCE_SELECTOR 宏声明,然后通过 appearance 设置属性,会怎么样呢?
测试后发现,结果是一样的。也就是说 UI_APPEARANCE_SELECTOR 并没有干什么事,正如文档所说,只是 tag 一下。看 UI_APPEARANCE_SELECTOR 宏定义如下
#define UI_APPEARANCE_SELECTOR __attribute__((annotate("ui_appearance_selector")))
由此可见,UI_APPEARANCE_SELECTOR 真的啥都没干。。但是出于代码可读性,还是在需要的地方加上它。
# 使用
一般地,UIView 的子类,和直接调用 setter 一样,直接通过 appearance 对其设置属性,当然时机在被添加到视图树之前。
建议在 appearance 的属性后加上
UI_APPEARANCE_SELECTOR宏。复杂需求可以考虑 UIAppearance 协议里另外几个方法来实现。
参考:
- http://nshipster.com/uiappearance/